
The Ultimate Checklist for Preventing Water Damage in Your Basement

Did you know that over 60% of basements suffer from moisture problems according to the American Society of Home Inspectors? For many homeowners, a heavy rainstorm doesn't just bring water; it brings an overwhelming sense of anxiety about mold growth and foundation stability. Effectively preventing water damage in basement areas isn't just about luck; it's about a strategic defense. With the average cost of foundation repairs hitting $5,000 in 2026, being proactive is the only way to protect your home's value and your family's health.
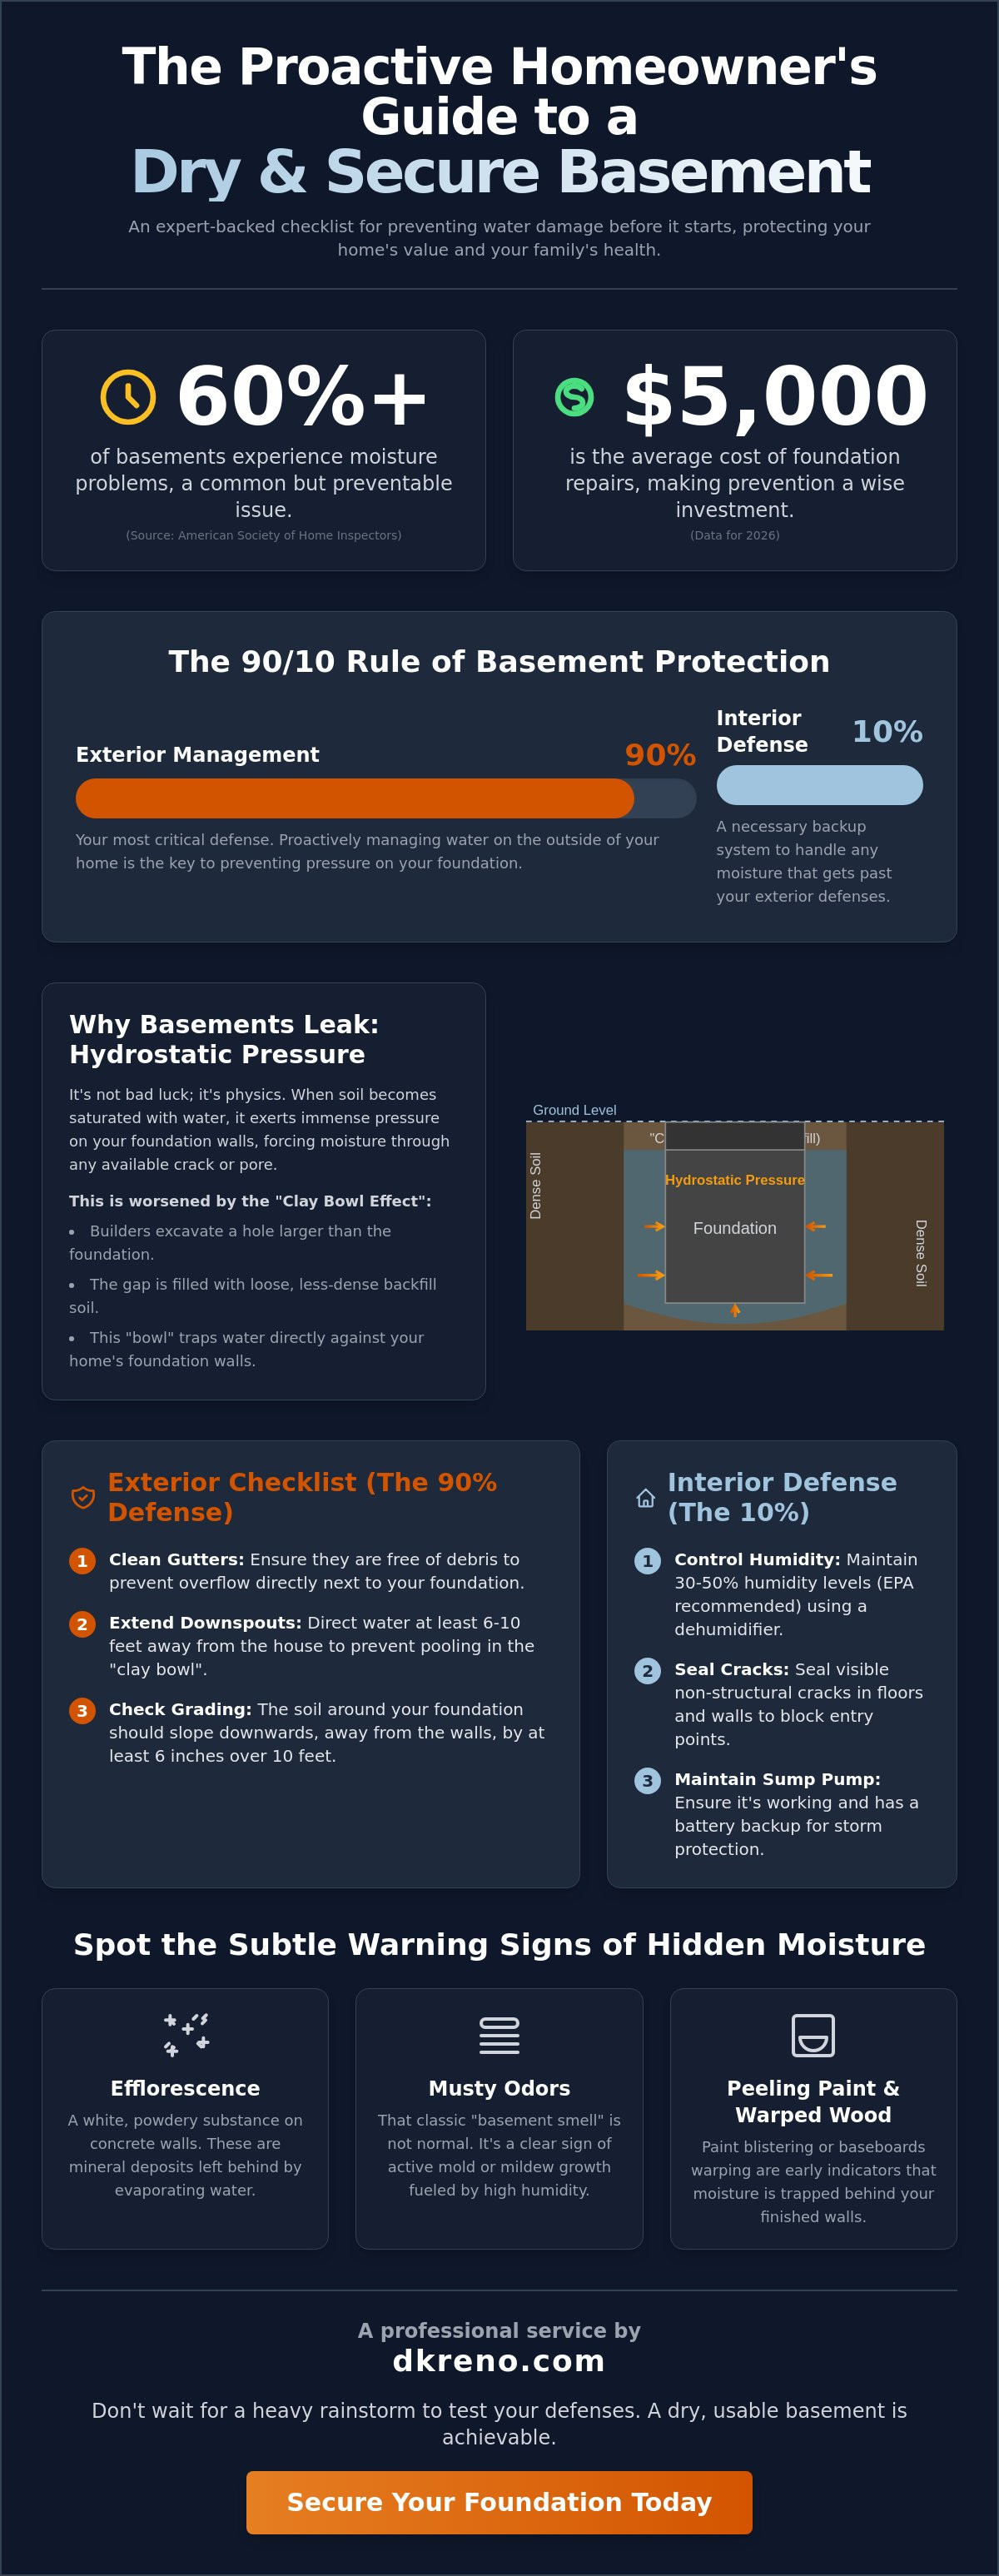
We know the stress of watching the forecast and wondering if your finished basement will survive the night. You deserve the confidence that comes with a professional-grade defense and a dry, usable space. This guide provides our expert-backed checklist to help you maintain the EPA-recommended 30% to 50% humidity levels year-round. We'll show you why basement protection is 90% exterior management and 10% interior defense. You'll learn how to meet the latest 2024 Uniform Plumbing Code standards for sump pumps and navigate the new 2026 flood regulations to ensure your home remains a safe, valuable asset.
Key Takeaways
Master the science of hydrostatic pressure and learn why managing your home's exterior grading is your most critical defense against foundation leaks.
Ensure your mechanical systems meet the latest standards by optimizing sump pump capacity and installing essential battery backups for storm protection.
Discover the exact steps for preventing water damage in basement areas by maintaining ideal humidity levels and identifying non-structural cracks before they escalate.
Learn to spot subtle warning signs, such as bowing walls or hidden moisture, through the use of advanced diagnostic tools like thermal imaging.
Follow our comprehensive waterproofing checklist to transform a damp storage space into a dry, secure, and fully usable part of your home.
Table of Contents Understanding Why Basements Leak: The Science of Hydrostatic Pressure Exterior Checklist: Keeping Water Away from the Foundation Mechanical Defenses: Sump Pumps and Drainage Systems Interior Management: Controlling Humidity and Sealing Cracks When to Call a Professional for Basement Restoration
Understanding Why Basements Leak: The Science of Hydrostatic Pressure
Most homeowners in Western Washington view a basement leak as a stroke of bad luck, but it's actually a predictable result of physics. Hydrostatic pressure is the primary force behind these issues. It refers to the weight and pressure exerted by standing water in the soil against your foundation walls. When the ground becomes oversaturated, that water has nowhere to go but through any available opening in your concrete. Preventing water damage in basement areas requires a clear understanding of how this pressure works and why our local geography makes it such a persistent challenge.
Our region is famous for clay-heavy soil, which acts like a dense sponge. Unlike sandy soils that allow water to drain away quickly, clay holds onto moisture for extended periods. This contributes to the "clay bowl effect." During the original construction of your home, builders excavated a hole larger than the foundation and filled the gap with loose backfill soil. This backfilled earth is less dense than the surrounding undisturbed ground, creating a literal bowl that traps water right against your home. To combat this, various Basement waterproofing techniques are used to manage the flow of water before it reaches your living space.
Water is persistent and will always find the path of least resistance. The three most common entry points we see in local homes include:
Floor Cracks: Even hairline fractures in the concrete slab can allow groundwater to seep upward.
Cove Joints: This is the specific point where your basement floor meets the wall; it's a natural seam that often fails under pressure.
Pipe Penetrations: Areas where utility lines or sewer pipes enter the foundation provide easy access for moisture if not properly sealed.
The Role of Soil Saturation in Arlington and Seattle
In the Pacific Northwest, we don't often deal with the sudden flash floods seen in other climates. Instead, we face back-to-back rain days that keep the ground in a constant state of saturation. This cycle never allows the soil to fully dry out, leading to a relentless expansion and contraction of the earth around your foundation. Saturated soil exerts thousands of pounds of pressure against foundation walls. This constant stress eventually forces moisture through the microscopic pores of your concrete, leading to the dampness you feel and see.
Common Signs of Hidden Basement Moisture
You don't always need standing water to know there's a problem. Efflorescence is a common indicator; it's that white, powdery substance you might see on concrete walls, which is actually mineral deposits left behind by evaporating water. Musty odors are another red flag. That classic "basement smell" isn't a natural part of a home; it's a sign of active mold growth fueled by high humidity. You should also watch for peeling paint or warped baseboards, as these are early warning indicators that moisture is trapped behind your finishes. Addressing these signs early is the most effective way of preventing water damage in basement renovations before they become costly restoration projects.
Exterior Checklist: Keeping Water Away from the Foundation
A dry basement starts at the roofline. While interior seals are helpful, preventing water damage in basement areas is primarily a game of exterior management. In Seattle, where we face months of consistent, soaking rain rather than occasional flash floods, your home's perimeter must work as a coordinated system to shed water. If your gutters, grading, or landscaping fail, you are essentially inviting that hydrostatic pressure we discussed earlier to press against your foundation. According to the University of Minnesota Extension on basement moisture, redirecting surface water is the most cost-effective way to prevent foundation failure.
Your gutters and downspouts are your first line of defense. A single inch of rain on a 2,000-square-foot roof produces about 1,200 gallons of water. If your gutters are clogged or undersized, that volume pours directly onto the soil next to your foundation. Regular maintenance is essential. Beyond cleaning, ensure you have splash blocks or downspout extensions in place to move that liquid away from the "clay bowl" created during construction. If you notice water already pooling near your foundation, consulting with a professional restoration team can help identify if moisture has already reached your structural components.
Landscaping also plays a surprising role in drainage. Planting large trees or dense shrubs too close to the house can interfere with how the ground sheds water. Roots can create channels that lead moisture toward the foundation, or in some cases, physically crack the concrete over time. Keep large plantings at least 10 to 15 feet away from the home to maintain a clear drainage path and protect your foundation's integrity.
Beyond landscaping, professional hardscaping can also play a major role in water management; to see how structural outdoor construction can improve your property's drainage, check out Cascade Outdoor Services.
The 10-Foot Rule for Downspouts
Discharging water too close to the house just recycles it back into the soil around your basement. You should aim to discharge all roof runoff at least 10 feet away from the foundation. Simple accordion extensions are a quick fix, but they can be unsightly or become trip hazards. Underground bubbler pots offer a more permanent, aesthetic solution by piping water to a pop-up emitter in the yard. To test your system, head outside during a heavy rainstorm. If you see water bubbling up at the foundation or spilling over the gutter edges, your current setup is failing to protect your home.
Correcting Negative Grading
Negative grading occurs when the ground slopes toward your house instead of away from it. This creates a trap where water pools against the siding and foundation. To fix this, add clean fill dirt with high clay content to create a 5% grade; this means the ground should drop about 6 inches over the first 10 feet from the wall. Avoid using bark or mulch for this purpose, as these materials are porous and hold water like a sponge. While regrading, be careful not to block the weep holes in your siding, as these are necessary for preventing water damage in basement walls by allowing trapped moisture to escape.
Mechanical Defenses: Sump Pumps and Drainage Systems
While managing exterior water is the most effective strategy, it isn't always enough to stop every drop of moisture. In many homes, especially those built on high water tables, mechanical systems act as the final line of defense. A sump pump is the heart of this protection, working tirelessly to manage rising groundwater before it ever touches your floor. Implementing these mechanical systems is a non-negotiable step in preventing water damage in basement areas that are prone to seepage. These systems provide the peace of mind you need when the rain starts to fall and the ground becomes saturated.
A standard sump pump sits in a basin, or pit, carved into the lowest part of the basement floor. For maximum efficiency, this pit should be at least 15 inches in diameter and 18 inches deep. As water levels rise in the soil, the liquid naturally flows into the pit through perforated walls or floor drains. Once it reaches a specific level, the pump's float switch activates, and the motor ejects the water through a discharge line to a safe location away from the foundation. This process keeps the soil under your slab from becoming oversaturated, which significantly reduces the hydrostatic pressure on your foundation walls.
Sump Pump Maintenance Checklist
A mechanical system is only as good as its last inspection. You should test your pump at least twice a year to ensure it's ready for the next storm. Pour a five-gallon bucket of water directly into the pit to ensure the float switch rises and the motor kicks in immediately. While you're there, reach in and clean the intake screen; debris like gravel, mud, or silt can easily clog the mechanism and cause the motor to burn out. Finally, walk outside and check the discharge line. During winter snaps, these lines can freeze or become blocked by ice; this forces water back toward your home and can lead to a flooded basement despite your best efforts.
The Importance of Battery Backups
The biggest storms in the Pacific Northwest often come with high winds that knock out the power. If your sump pump relies solely on your home's electrical grid, it will stop working exactly when you need it most. This is why a battery backup system is essential for preventing water damage in basement spaces. You can choose between localized battery backups that power your existing pump or secondary water-powered backup pumps that use your home's water pressure to eject groundwater. It's vital to remember that the typical lifespan of a sump pump battery is three to five years. If your battery is older than that, it's time for a replacement to ensure you aren't left vulnerable during the next blackout.
For homes with persistent perimeter leaks, an interior French drain may be the only long-term solution. This involves cutting a channel into the floor to direct water directly to the sump pit. Additionally, don't overlook your window wells. High-quality window well covers prevent these areas from turning into "aquariums" during heavy downpours, keeping water away from the glass and seals. These layers of defense work together to keep your home dry and your foundation healthy.
Interior Management: Controlling Humidity and Sealing Cracks
Once you've secured the exterior and installed a reliable sump pump, your focus must shift to the environment inside the walls. Even a basement that looks dry can harbor high levels of moisture vapor. Concrete is naturally porous; it acts like a hard sponge that allows water vapor to migrate from the damp soil into your living space. Effectively preventing water damage in basement areas requires a two-pronged interior approach: managing the air quality and sealing the physical entry points that moisture exploits.
High humidity is the primary driver of mold growth and structural rot in finished basements. The U.S. Environmental Protection Agency recommends keeping indoor relative humidity between 30% and 50%. When levels exceed 60%, mold spores begin to colonize organic materials like drywall paper and wood framing. To protect your investment, consider installing a professional-grade vapor barrier before finishing any walls. This prevents "concrete sweating," which occurs when warm, humid indoor air hits the cool foundation surface and condenses into liquid water.
Many homeowners attempt to solve moisture issues with "waterproof paint." While these products can stop minor dampness, they often fail under the high pressure of the Pacific Northwest's wet season. True protection comes from penetrating sealants or specialized floor coatings that bond with the concrete at a molecular level. If you've noticed active leaks or recurring damp spots, our water damage mitigation team can provide a comprehensive assessment to ensure your interior finishes remain protected for years to come.
Selecting the Right Dehumidifier
A standard portable dehumidifier from a big-box store is often insufficient for a typical Seattle basement. These units are usually rated for small rooms and require manual emptying, which leads to inconsistent performance. For a space larger than 800 square feet, a high-capacity, whole-basement dehumidifier is a better choice. Look for a self-draining model that can be piped directly into your sump pit or a floor drain. This ensures the system runs continuously without intervention, maintaining that critical 50% humidity threshold regardless of the weather outside.
Maintaining a dry environment is especially critical if you plan to use your basement for a laundry room. While this guide focuses on the Pacific Northwest, homeowners in other regions like North Texas can find similar value in specialized services; for instance, washer and dryer rentals Dallas offer a flexible way to equip a utility space once moisture levels are under control.
Sealing Foundation Cracks
Not every crack in your foundation is a sign of a structural collapse, but every crack is a potential highway for water. You can distinguish "settling cracks" by their size; those narrower than a nickel (roughly 2mm) are usually non-structural. These can often be repaired using a DIY crack injection kit featuring epoxy or polyurethane. Epoxy is ideal for structural reinforcement because it's stronger than the concrete itself, while polyurethane is better for preventing water damage in basement walls because it remains flexible, allowing it to expand and contract with the soil. However, if you see horizontal cracks or walls that appear to be bowing inward, these are structural threats that require immediate professional intervention.
When to Call a Professional for Basement Restoration
While the previous steps are essential for preventing water damage in basement environments, some situations demand professional intervention. If you encounter standing water after a storm or notice foundation walls that appear to be bowing inward, the time for DIY fixes has passed. These signs indicate that the hydrostatic pressure has overwhelmed your current defenses. Professional restoration specialists bring the tools and expertise needed to stop active flooding and prevent permanent structural compromise. We take the burden off your shoulders by identifying the root cause of the failure and implementing a permanent solution.
One of the most significant advantages of hiring experts is the use of thermal imaging technology. Water often hides behind finished drywall or under high-end flooring, creating invisible pockets of moisture that lead to wood rot and mold. By identifying these "cold spots" with infrared cameras, we can target our drying efforts without unnecessarily tearing out your entire finished basement. This precision saves you time and reduces the overall cost of the reconstruction process. Our goal is to return your home to a safe, dry state as quickly as possible.
The Professional Water Mitigation Process
Experts utilize a specialized "Extract, Dry, Disinfect" workflow to handle moisture emergencies. We don't just use standard household fans; we deploy industrial-grade air movers and LGR (Low Grain Refrigerant) dehumidifiers designed to pull moisture from deep within your home's framing. This high-powered equipment is necessary for preventing water damage in basement renovations from turning into a total loss. For residents in the North Sound, DK Production’s restoration services offer a seamless transition from emergency mitigation to high-quality reconstruction and remodeling.
Insurance and Documentation
Proper documentation is the key to a successful insurance claim. You should photograph all standing water and keep a detailed inventory of saturated belongings before any mitigation begins. It's vital to work with a contractor who understands the nuances of insurance restoration. They can provide the moisture maps and technical data adjusters require to approve your claim. This partnership ensures that your budget remains transparent and your coverage is maximized. If you're concerned about the health of your foundation or need a plan for future upgrades, contact DK Production for a professional basement assessment in Arlington. Our team provides the expert-backed confidence you need to protect your home's structural health and overall value.
Take Control of Your Home’s Foundation Today
Protecting your property from the Pacific Northwest's relentless wet season requires a proactive mindset and a coordinated defense. Success lies in the balance between rigorous exterior water management and robust mechanical systems. By maintaining your gutters and ensuring your sump pump is storm-ready, you've already taken the most important steps toward a dry home. Successfully preventing water damage in basement areas isn't just about stopping a flood; it's about creating a healthy, controlled environment that preserves your property's value for the long term.
Since 2014, our team has served Arlington and Snohomish County as specialists in insurance restoration and high-end remodeling. We understand the stress that moisture issues cause, and we're here to take that burden off your shoulders with expert-backed solutions. Whether you need emergency water mitigation or a preventative upgrade to your finished space, our expertise ensures a seamless, professional experience from the first inspection to the final coat of paint.
Don't wait for the next heavy downpour to test your home's defenses. Get a Professional Water Damage Assessment from DK Production today to secure your peace of mind. You deserve a home that stands strong against the elements, and we're ready to help you achieve it.
Frequently Asked Questions
Is a small amount of water in my basement normal after heavy rain?
No amount of water in your basement is considered normal or safe. Even minor seepage is a clear sign that hydrostatic pressure has found a weakness in your foundation walls. If left unaddressed, these small leaks can lead to mold growth or structural decay within months. You should investigate any dampness immediately to ensure your home's long-term health and structural integrity.
How much does it cost to install a sump pump in Washington state?
The average cost to waterproof a basement, which includes sump pump installation, is $5,234 according to data published by Angi on March 17, 2026. Typical project costs range from $2,461 to $8,194 depending on the system's complexity. While minor interior repairs might start around $600, a complete professional system for a large home can reach $15,000 to ensure total protection.
Can I finish my basement if it has had water issues in the past?
You can absolutely finish a basement that had prior issues as long as the root cause is permanently resolved. We recommend a professional assessment to verify that your exterior drainage and sump pump systems are functioning perfectly before installing drywall or flooring. This proactive approach is the most effective strategy for preventing water damage in basement renovations and protecting your new investment.
What is the best way to clean up water in a basement after a leak?
The most effective cleanup involves a professional workflow of extraction, drying, and disinfection. You must remove standing water within 24 to 48 hours to prevent mold colonization. Using industrial-grade LGR dehumidifiers and high-velocity air movers is essential for pulling moisture out of porous materials like wood studs and concrete. DIY fans usually lack the power to reach deep-seated dampness.
Does homeowners insurance cover basement flooding from rain?
Standard homeowners insurance typically does not cover basement flooding caused by heavy rain or rising groundwater seepage. Most policies require a separate flood insurance policy or a specific water backup rider to cover sump pump failures. It's vital to review your policy details before a storm hits to understand your specific coverage limits and avoid unexpected out-of-pocket expenses during a restoration.
How often should I clean my gutters to prevent basement leaks?
In the Pacific Northwest, you should clean your gutters at least twice a year, typically in late spring and late fall. If your home is surrounded by evergreens, you may need to clear them quarterly to prevent blockages. Clogged gutters are a leading cause of foundation saturation, making regular maintenance a simple but critical task for preventing water damage in basement areas.
Can landscaping really stop my basement from leaking?
Strategic landscaping and grading are highly effective at reducing the volume of water reaching your foundation. By ensuring the ground slopes away from your home at a 5% grade, you redirect thousands of gallons of runoff toward the yard rather than your walls. Landscaping alone won't stop a structural crack, but it significantly reduces the hydrostatic pressure that causes leaks in the first place.
What is the difference between water mitigation and restoration?
Water mitigation is the emergency phase focused on stopping the source of water and drying out the structure to prevent further damage. Restoration and reconstruction involve the actual rebuilding of your space, such as replacing drywall, flooring, and cabinetry. Our team handles both phases, providing a seamless transition from a flooded room back to a beautiful, finished living area that meets your unique needs.


Comments